Adding an Organization User Template
This page will help you add a new organization user template.
ImportantIf this is the first organization user template you are adding, you should consider one of the preinstalled Organization User templates before adding a new one.
BioT comes preinstalled with five Organization User templates: BioT Support, Manufacturer Admin, Manufacturer Operator, Organization Operator and Organization Admin. Of these, the BioT Support, Manufacturer Admin and Organization Admin templates may not be deleted, however they may all be modified.In the BioT platform, Manufacturer organizations are no different from Healthcare Provider organizations, and the Organization User template is used to create templates for users of both kinds of organizations.
Organization User Template Types
- BioT Support: Used to create users for BioT support personnel.
- Manufacturer Admin: Used to create administrative users who have the highest level of authorization privileges and can do anything in the system.
- Manufacturer Operator: A default template used for non-admin users
- Organization Admin: A template for care provider account owners. Users of this template have authorization to make changes to all aspects of entities within their organization.
- Organization Operator: A default template for non-admin care provider users.
Follow the procedure below to add a new organization user template.
Step 1 - Templates List
- Launch the BioT Console.
The console opens on the Templates list.
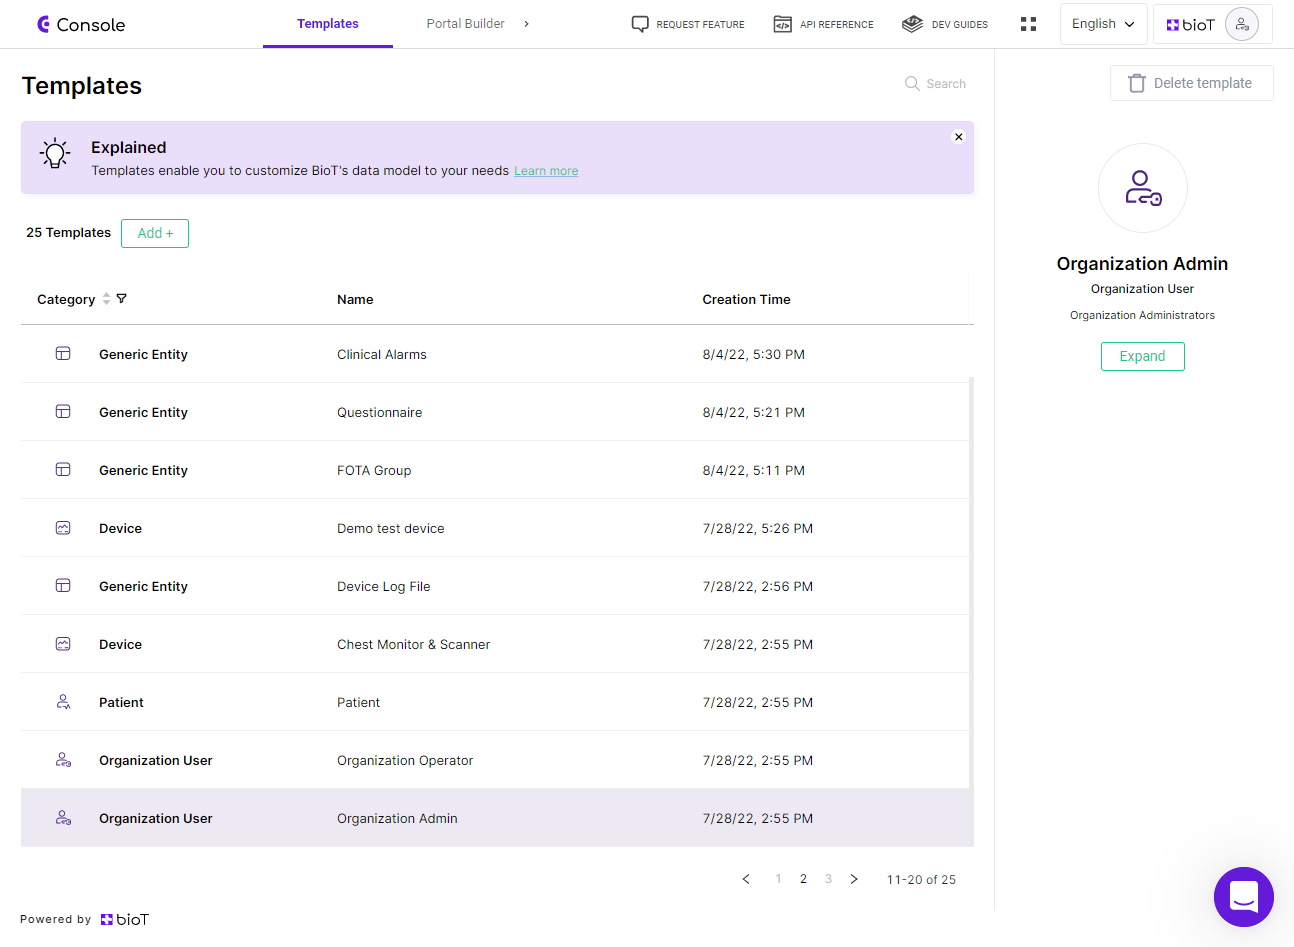
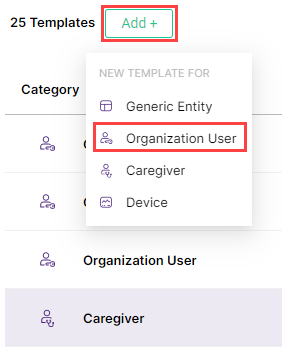
- From the Templates tab, click Add+.
- Select the Organization User template type from the dropdown menu.
Add Organization User Template
Step 2 - Overview Tab
- Add a name and optional description for the template. Use a template name that reflects the user type (for example, "Organization Admin").

New Organization User Template Overview
- If you want to make the template private and usable only by a specific organization, check the Assign Template to Organization checkbox toward the bottom of the page. A private template can be added through the Organization Portal only by the assigned Organization. A common use for a private template is for you, the manufacturer, if you want to create templates for manufacturer users that you don't want your clients to use.
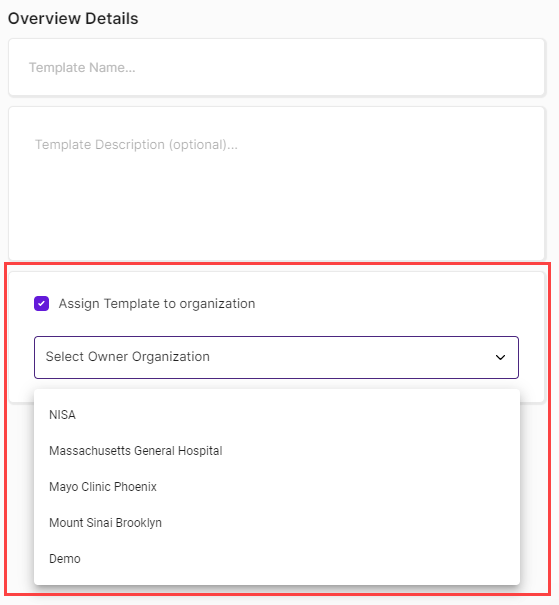
- In the dropdown that appears, select the organization that you want to be able to use the template.
- Click Next.
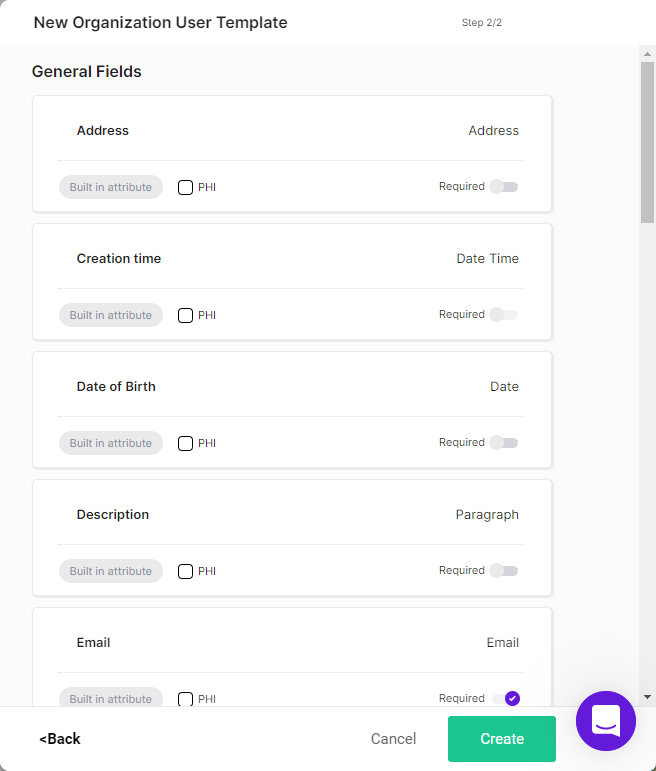
Step 3 - General Fields
The General fields page is displayed with the list of built-in attributes.
General attributes include information that the system should keep about the organizational user. For example, one of the General attributes may be an Address attribute which would provide the user's address.
Built-In Regular Fields
Change any details in the built-in general fields as needed, or click the trash can icon to remove (or disable in case of built-in attributes) any unneeded field from the template.
The following built-in General attributes appear in all new Organization User templates:
Name
Attribute type: Name
The full name of the user.

Name Field
Email
Attribute Type: Email
The user's email address.

Email Field
Phone
Attribute Type: Phone
The user's phone number.

Phone Field
Date of Birth
Attribute Type: Date
The user's date of birth.

Date of Birth Field
Gender
Attribute Type: Single Select
The user's gender. Possible options include Male, Female and Unspecified.

Gender Field
Description
Attribute type: Paragraph
Any additional details about the user can be entered in this field.

Description Field
Address
Attribute Type: Address
The user's mailing address.

Address Field
Locale
Attribute Type: Locale
The locale in which the user resides.

Locale Field
Owner Organization
Attribute type: Entity
The organization by which the user is employed.

Owner Organization Field
Enabled
Attribute Type: Boolean
Whether or not the user is allowed to log in.

Creation Time
Attribute Type: Date Time
The time and date when the user's profile was created.

Creation Time Field
Last Modified Time
Attribute Type: Date Time
The time and date when the user's profile was most recently modified.

Step 4 - Add General Field
If your users need more attributes to keep about the user, scroll to the bottom of the Regular attributes list and:
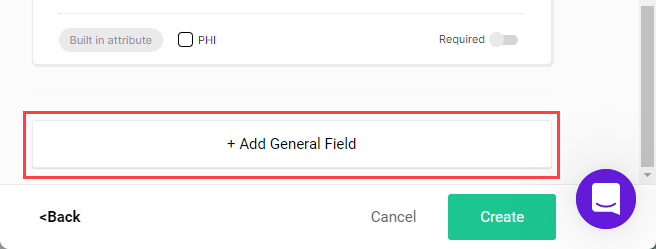
- Click + Add General Field.
- Click Please choose a name and enter a name for the new field.

Choosing a Field Name
- Click the Choose Type dropdown and select the attribute type from the list (see Attribute Types for a full list of types and their parameters).

Choose Attribute Type
- Complete the remaining parameters for the Attribute Type.
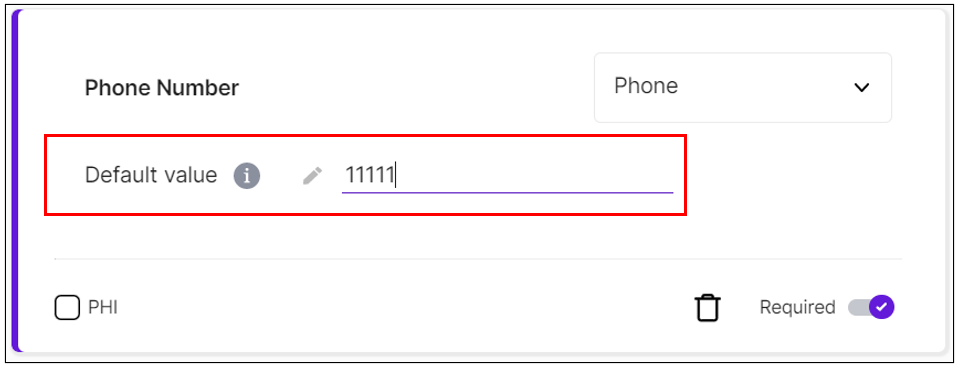
- For fields you want to define as obligatory, select Required.

PHI and Required
For a field marked as Required, you will be asked to set a Default value. A default value is used when users want to edit the data of an existing organization, but there are some details they cannot enter, due to lack of knowledge or any other reason. In this case, they can leave the pre-defined default value and save their changes.
NoteDefault values can be used only when editing an existing organization. When users create a new organization, they must fill in all required fields with actual values.
For example, users who edit the data of an Organization Admin might be required to enter a phone number. If the phone number is unknown or irrelevant, they can leave the pre-defined default value for this field, demonstrated below.
Step 5 - Finish Template
When you have finished adding fields, click Create. The template is created, and you return to the template list.
NoteYou can click Cancel at any time to discard the template and return to the templates list.
Updated 8 months ago