Direct Device Connection
For a device to be able to directly communicate with BioT it needs to first install a certificate and then use it to connect to BioT.
Certificate Installation
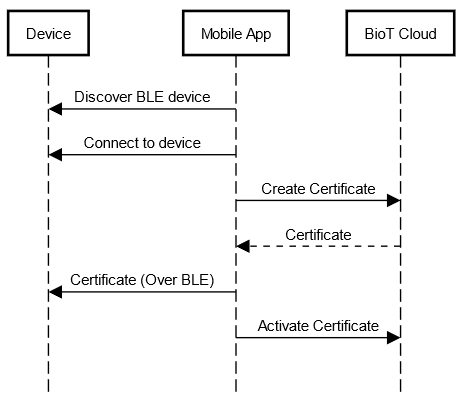
Assuming the device is already registered on the system, there are two steps to create a certificate:
- Create a certificate using create certificate API.
- Activate the certificate using activate certificate API.
If the certificate is not active, then it will not be able to communicate with the cloud.
Manual Certificate InstallationDuring the development stage, you can create a certificate for a device on BioT Manufacturer Portal, download it and then transfer the device using a wired connection, e.g., USB.
See Generate and Download a Permanent Device Security Certificate for more information.
When creating a certificate, BioT will specify the device clientId and IoT endpoint URL.
The URL is the IoT address that the device should connect to.
The clientId is used to identify the device when publishing messages to IoT.
The device needs to store the certificate on a secure location.
Example Certificate Transfer to the Device Flow:

Accessing BioT API
Connecting to BioT using a certificate allows MQTT communication to the device. This covers most of the operations that the device requires.
In certain cases, the device needs to perform actions that are not covered by BioT MQTT support.
In these cases, the device can make RESTful HTTPS calls.
See Device API access for how to obtain a token and make API calls from the device.
Updated 5 months ago
