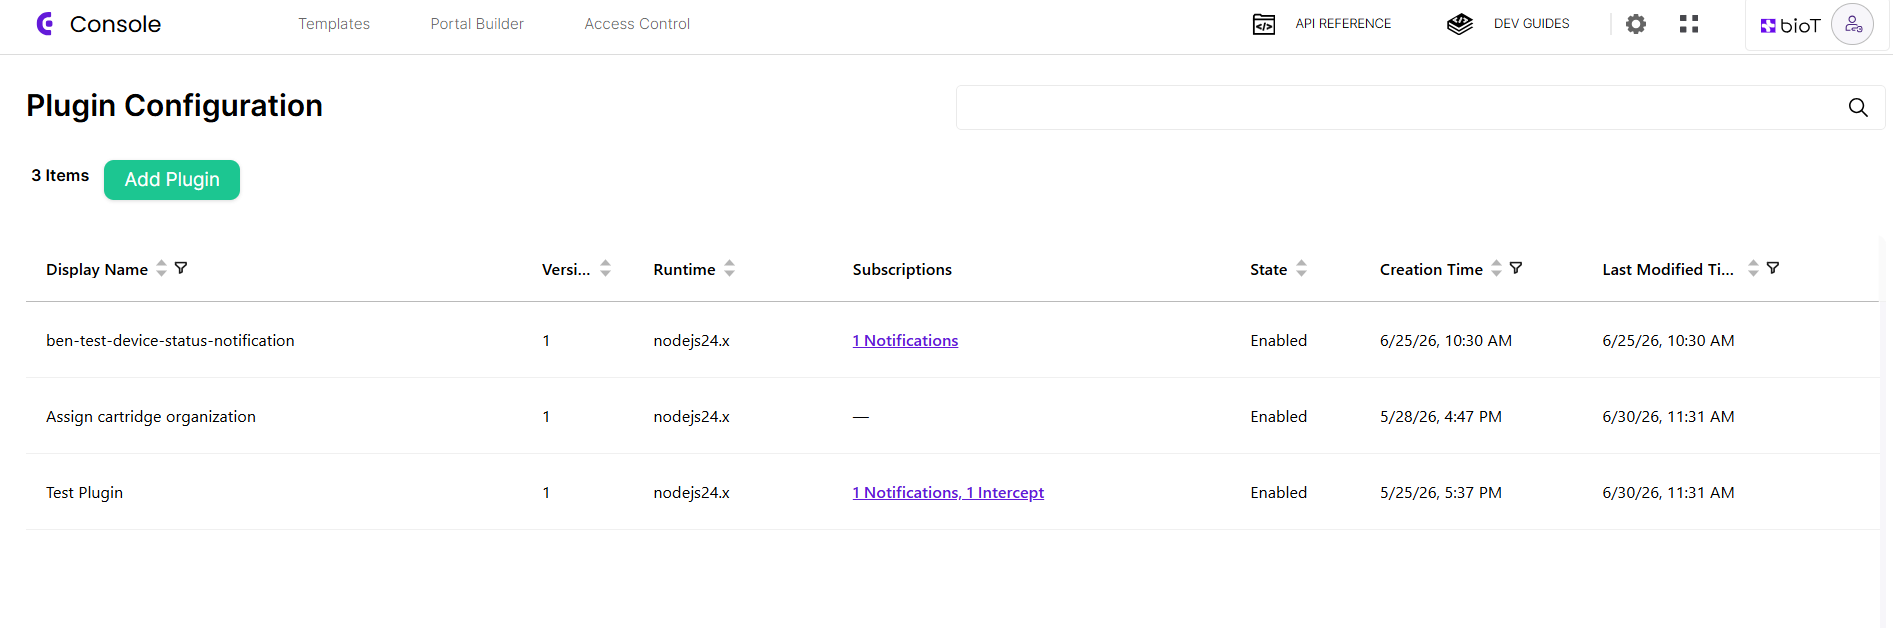
Plugin Configuration Management
Plugins in BioT enable you to customize the data that flows into and out of the platform. The Plugin Configuration Management page in the BioT Console allows you to view, add, and edit plugins.
Adding a Plugin
To add a new plugin:
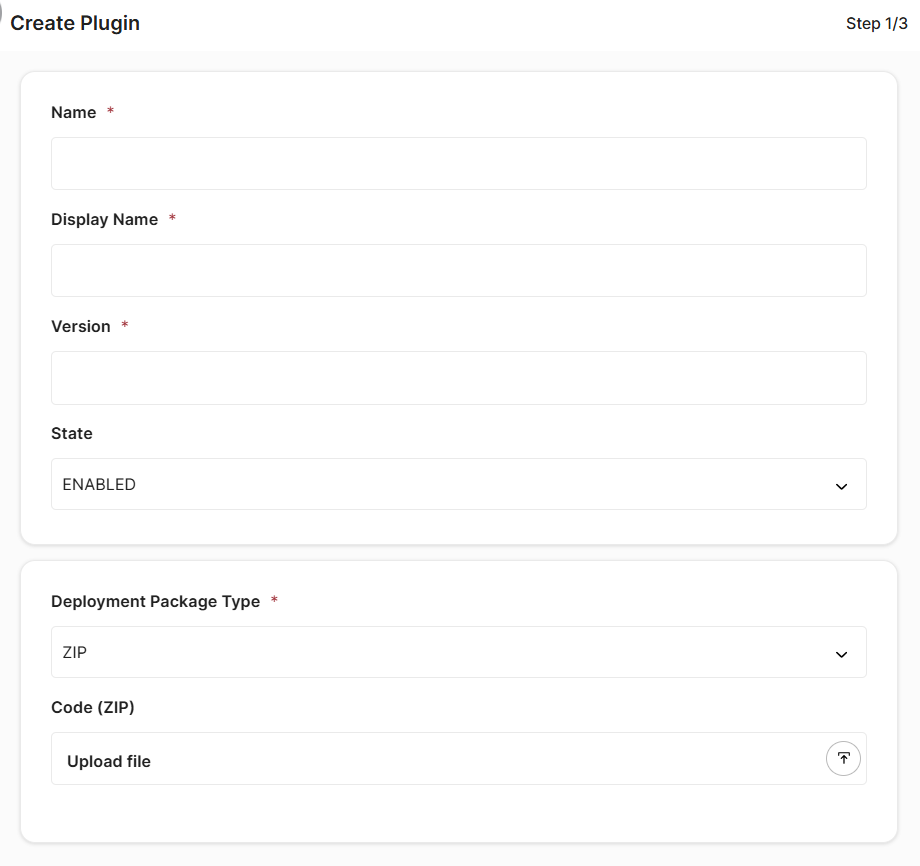
Step 1 - Basic Info
- On the Plugin Configuration Management page, click Add Plugin. The Create Plugin panel opens.
- Fill in the following fields:
| Field | Description | Required |
|---|---|---|
| Name | The plugin's unique name in the BioT system | Yes |
| Display Name | The plugin's display name | Yes |
| Version | The version of the plugin | Yes |
| State | Whether the plugin is enabled or disabled upon creation | No |
| Deployment Package Type | The package format: ZIP or IMAGE | Yes |
| Code (ZIP) | The plugin ZIP file to upload. Displayed when Deployment Package Type is ZIP | No |
| Image Tag | The container image tag to deploy. Displayed when Deployment Package Type is IMAGE | No |
-
Click Next.
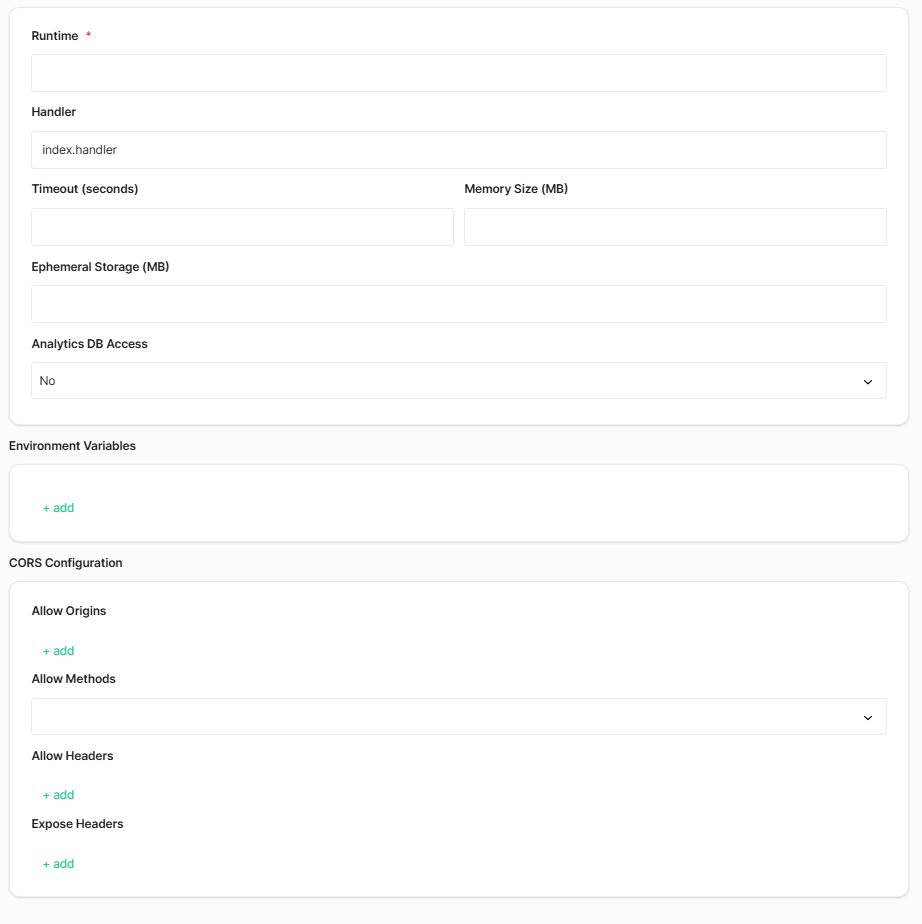
Step 2 - Configuration
- Fill in the following fields:
| Field | Description | Required |
|---|---|---|
| Runtime | The runtime environment for the plugin (e.g., nodejs24.x, python3.14, java21) | Yes |
| Handler | The entry point for the plugin. Defaults to index.handler | No |
| Timeout (seconds) | Maximum execution time allowed for the plugin | No |
| Memory Size (MB) | Memory allocated to the plugin | No |
| Ephemeral Storage (MB) | Temporary disk storage available to the plugin during execution | No |
| Analytics DB Access | Whether the plugin has read access to the BioT Analytics DB | No |
| Environment Variables | Key-value pairs passed to the plugin as configuration parameters | No |
| CORS Configuration | Cross-origin resource sharing settings, including allowed origins, methods, headers, and exposed headers | No |
-
Click Next.
Step 3 - Subscriptions
- Configure the plugin's subscriptions:
Notifications
Click + add to add a notification subscription. The following fields are available:
| Field | Description | Required |
|---|---|---|
| Entity Type | The entity type to subscribe to, such as device, patient, or caregiver. For the full list of available entity types and actions, see BioT Notification Plugins | Yes |
| Action | The action that triggers the notification, such as create or update | Yes |
| Template | The specific template name to scope the subscription to. When specified, the plugin is only triggered for entities of that specific template. Optional | No |
Interceptions
Click + add to add an interception subscription. The following fields are available:
| Field | Description | Required |
|---|---|---|
| Type | The interception type: PRE_REQUEST, POST_REQUEST, or ADAPT_ENTITY. For more information, see BioT Interceptor Plugins | Yes |
| API ID | The API endpoint to intercept. You can substitute a specific value for a path parameter to scope the interception to that value only. For example, POST/organization/v1/users/caregivers/templates/nurse intercepts only the "nurse" caregiver template | Yes |
| Order | The execution order when multiple interceptors exist for the same API | No |
Cron Schedule
For non-specific plugins, configure a cron expression to schedule the plugin execution. For more information, see BioT Non-Specific Plugins.
- Click Save.

Editing a Plugin
To edit an existing plugin, click on the plugin row in the list. The Edit Plugin panel opens with three tabs — Basic Info, Configuration, and Subscriptions — corresponding to the three steps above. Make your changes and click Save Changes.
The Basic Info tab also includes an Open in AWS Console link, which opens the plugin's Lambda function directly in the AWS Console. This requires an AWS IAM user with the appropriate permissions. If you do not have an IAM user configured, contact BioT Support."
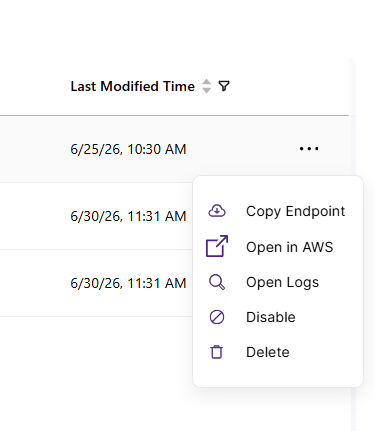
Plugin Actions
Each plugin in the list has a ... menu with the following actions:
| Action | Description |
|---|---|
| Copy Endpoint | Copies the plugin's endpoint URL to the clipboard |
| Open in AWS | Opens the plugin's Lambda function directly in the AWS Console. Requires an AWS IAM user with the appropriate permissions. If you do not have an IAM user configured, contact BioT Support |
| Open Logs | Opens the plugin's CloudWatch logs in the AWS Console. Requires an AWS IAM user with the appropriate permissions. If you do not have an IAM user configured, contact BioT Support |
| Disable | Disables the plugin without deleting it |
| Delete | Permanently deletes the plugin |
For more information about plugins and deployment options, see Custom Plugin Deployment.
Updated 22 days ago