Embeding Web Content (iFrame)
BioT portals allow the developer to embed their own content inside specific sections.
This feature can be used to:
- Show an external application/dashboard inside the BioT portal.
- Have the ability to invoke predefined actions in the BioT application from within the embedded content.
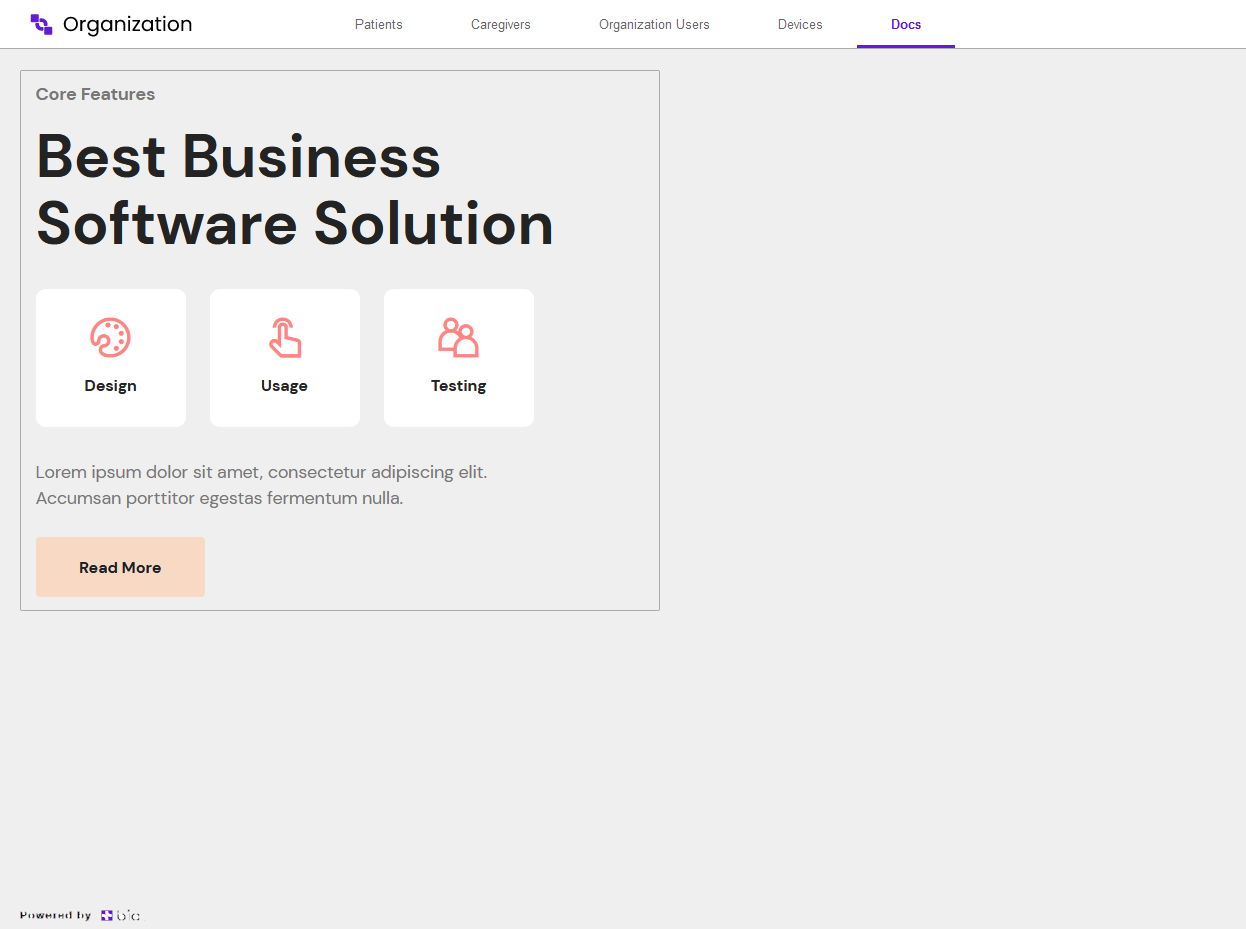
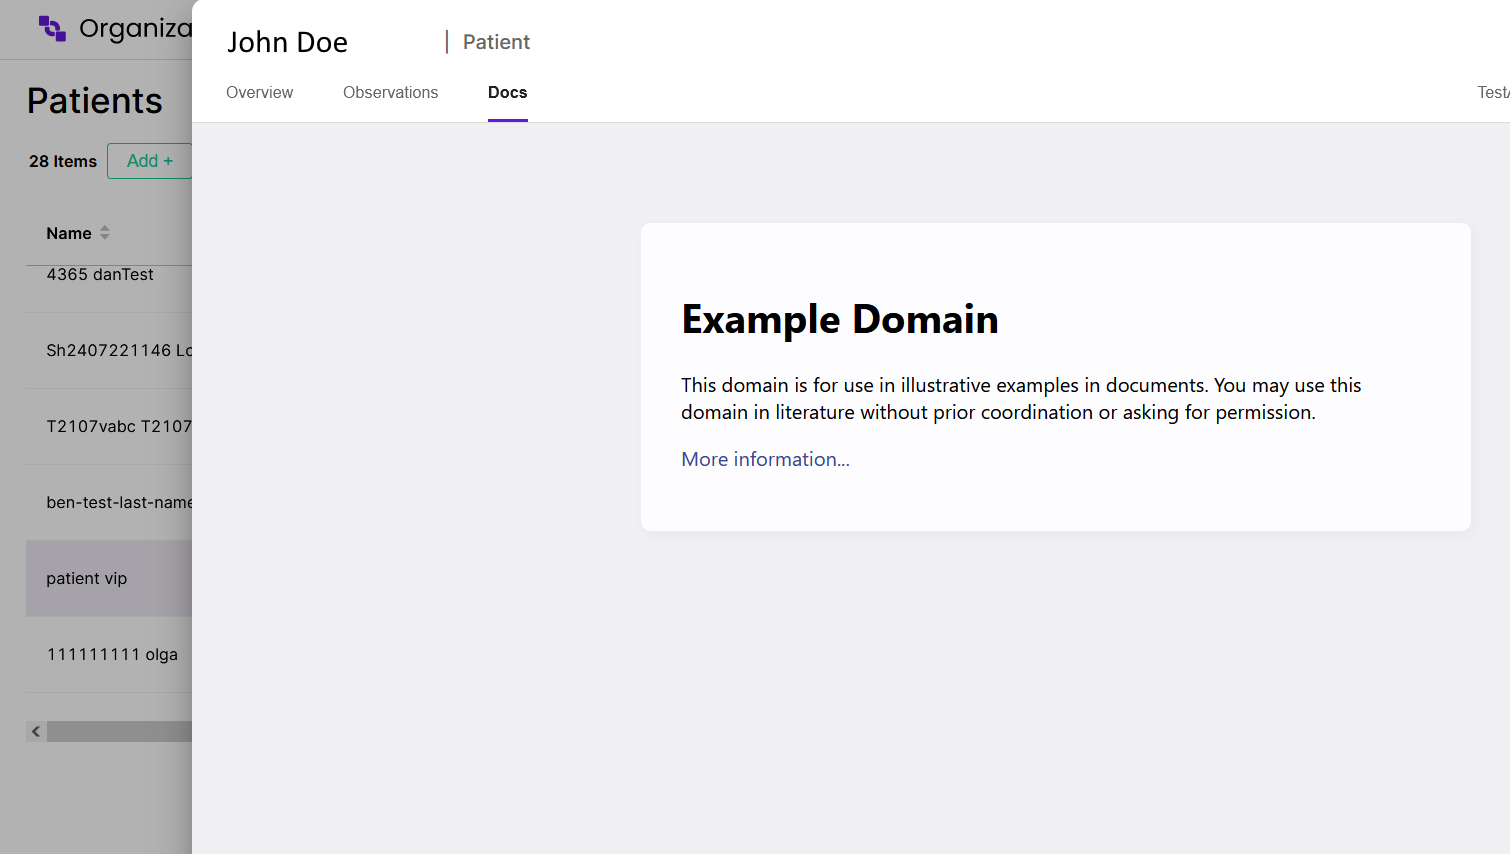
The embedded component can be put in a new tab in the main screen, or be part of the “Expand View” of a specific entity.
Embedding main tab example:
Embedding expanded tab under the patient example:
Component Creation
The embedded web component is wrapped by an iframe HTML tag.
You can host the context anywhere, and specify a direct link to it in the BioT portal builder.
Hereis an example HTML to embed in BioT.
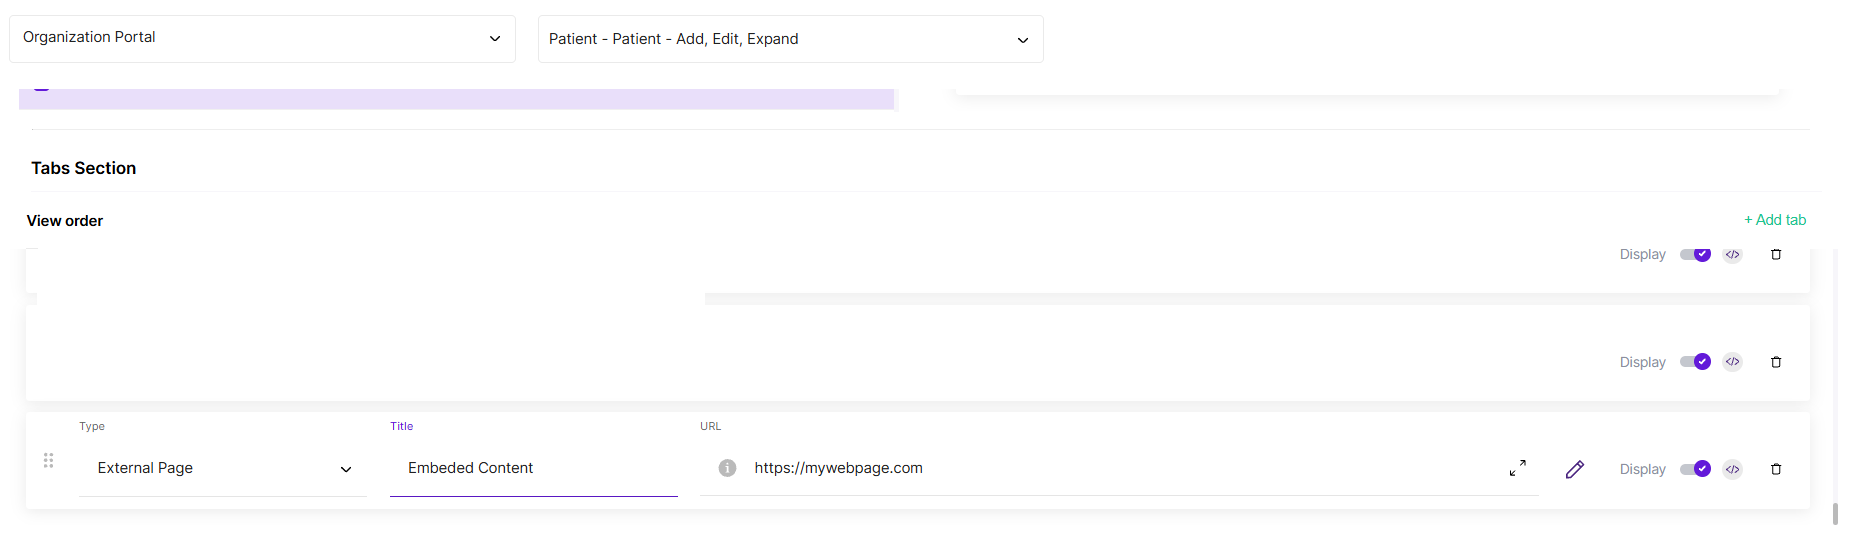
For example, in the portal builder, browse to the patient section, create another tab for an external page, and insert a link to your web page. See below image for more info.
Communication Between BioT and the Component
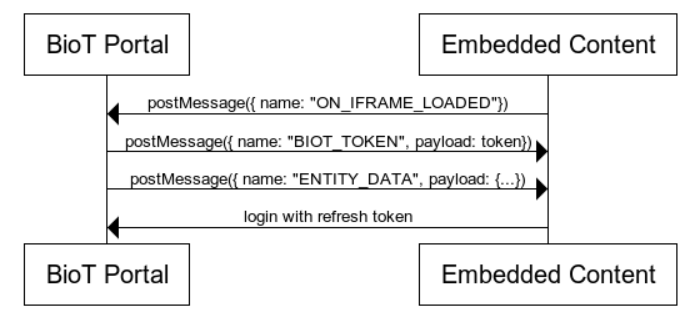
All communication between BioT and the embedded content is handled using the postMessage API.
The BioT portal (the parent page) passes both the user token and the currently browsed entity. You can use the token for authentication and the entity to display the relevant data. For example, when adding a tab in the patient view, you can leverage this to present the patient’s details.
General Flow
All messages sent between BioT and the component will follow this basic structure:
{
  name: UNIQUE_UPPERCASE_STRING;
  payload:{ An object with the required payload };
}
BioT ➡ Component Messages
BioT can send the following messages to the component.
Action (Message) name | Payload | Comments |
|---|---|---|
BIOT_TOKEN | { | This |
ENTITY_DATA | { | Only sent in expand view. The |
Component Messages ➡ BioT
Action (Message) name | Payload | Comments |
|---|---|---|
ON_IFRAME_LOADED | null | The component uses this message to let the parent (BioT portal) know that it has finished loading. |
HANDLE_EXPAND_ITEM | { | See detailed explanation below |
ON_RELOAD_ENTITY | NULL | The component uses this message after an update to the entity data is made, in order to make sure the overview (container) is updated as well |
Using the HANDLE_EXPAND_ITEM Message
HANDLE_EXPAND_ITEM MessageThe HANDLE_EXPAND_ITEM message pushes a new expand item to the expand stack, either making the expand view display that item, or changing the active tab.
The message structure is as follows:
entityType: is the expanded entity’s type (“patient”, “device”, ect.)entityToExpand: is the actual JSON object entity data to display in the tab. This is usually obtained from the appropriate GET API call. For example, to display a patient's data, you will pass here the response from the GET patient API call.selectedTabKey: is used to select the tab in the newly expanded item. At the moment, this is only used withentityType='patient'to expand directly into the overview or measurement sections. To select the overview tab, passoverviewas the value. To select the observation tab, passmeasurementsas the value.selectedTabAdditionalProps: are additional properties that the selected tab can accept. At the moment, this parameter only applies to themeasurementstab.
The value of this property is a JS object with the following structure:{ measurementOption: 'LIVE' | 'HISTORY', //selects the live or history sub tab graphRange?: { startDate: "2022-11-21T14:39:12Z" | null; //ISO 8601 formatted date view: '1s' | '5s' | '15s' | '30s' | '1m' | '5m' | '15m' | '30m' | '1h' | '2h' | '6h' | '12h' | '1d' | '7d' | '1M' | '3M' | '6M' |'1y' | '2y' | '5y' | null; //The time inteval for the graph }; }
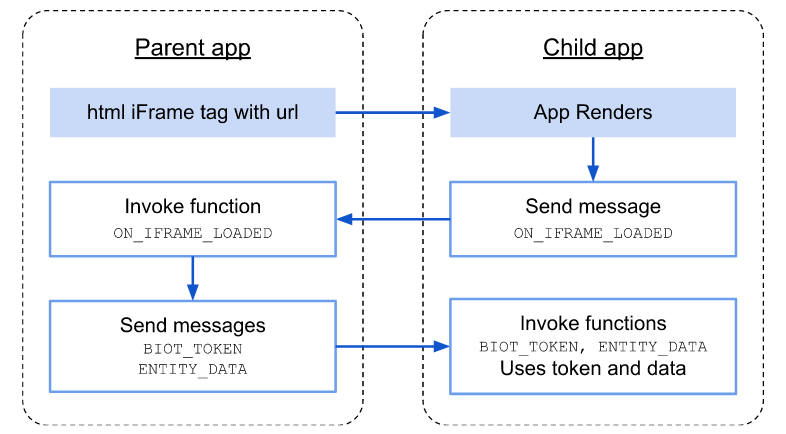
Common message flow example
Embedding Local Page in BioT During Development
During development, you may want to embed your local web page inside the BioT portal to preview how it will look and behave in context. There are two simple ways to achieve this:
- Use ngrok
Expose your local development server to the internet with ngrok.
This generates a secure, public URL you can embed directly in the BioT portal for testing. - (Recommended) Use Visual Studio Code Port Forwarding
If you’re developing with Visual Studio Code, take advantage of its built-in port forwarding feature.
This provides a reliable and secure way to preview your locally running application inside the BioT portal.
Updated 2 days ago